8.25.2014

DIY Storage Baskets

I have been in the nesting mode for the past few months and have been organizing my house like crazy! Baby no. 2 will be here soon and I desperately feel the need to get everything in order. So, one of the rooms on my list of "to do's" was my sons room. He has a ton of toys and now that I am using his closet as storage for the new baby clothes I needed to a way to store some of those toys; preferably out of sight. I thought the best way to do that would be to utilize the area under his bed. I was particular though, I wanted baskets that could roll and that weren't too expensive... it was nearly impossible to find.

 I happened to be at The Container Store and found some metal baskets on clearance and decided I would make my own rolling storage carts with them. They turned out pretty good I must say, so here's a simple tutorial in case you'd like to make your own!


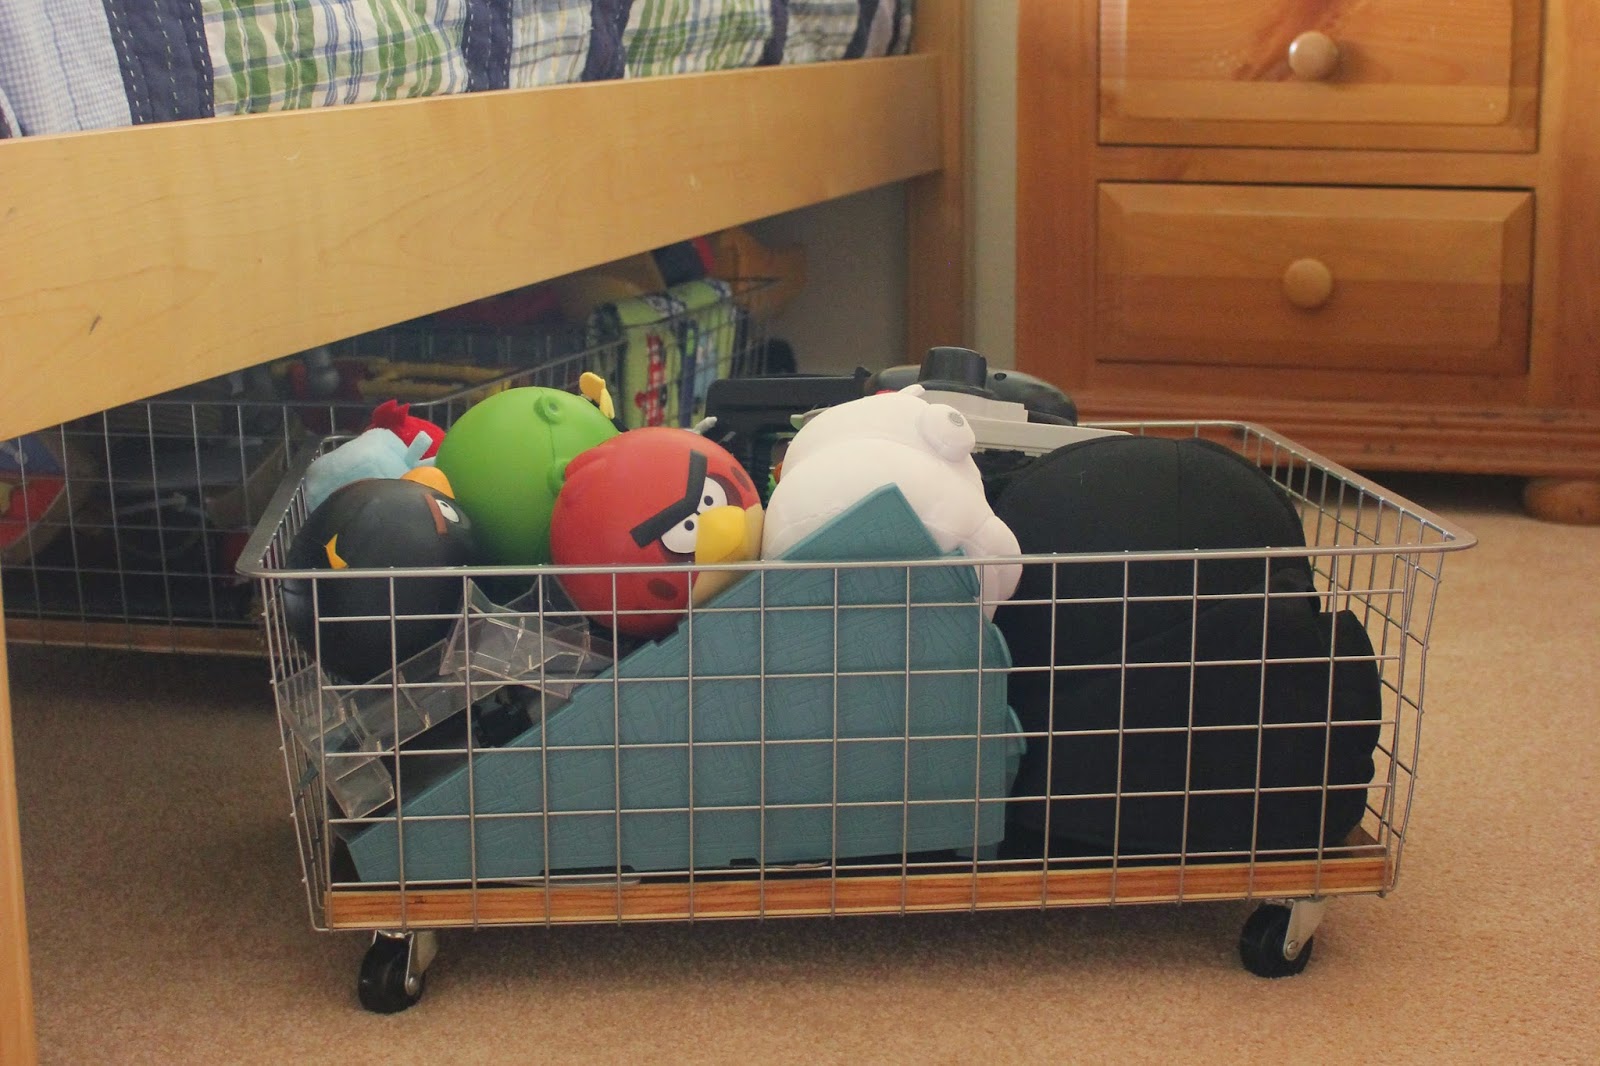
I made three of them, but I probably could have fit four under his twin bed. 
These are the elfa drawers from the Container Store, on clearance for $8.00 a basket (normally $16.00)!

Next step was to get the wood and cut it to size to fit inside the basket (this will be used to easily mount the wheels). I bought a walnut veneer board at a local wood store for $23.00. I needed three rectangular pieces and the size of the board was just enough - as you see I had two scrap pieces left over after cutting.


After I cut the first piece I made sure that it fit well in the basket.


I liked the color of the wood as it was, but wanted it to be durable, so I put a couple coatings of clear polyurethane on them.


Once that was dry I could mount the wheels!


These wheels are from Home Depot and they are the 1-1/2" rubber wheel swivel plate casters. Since I was installing over the metal basket, I used two washers under each screw to help lift the plate. Note that once screwed in, the plate should be very tight to the board. My wood board was about 3/4" thick and I used 5/8" long screws.

To mount them, I put the basket with wood upside down over a bucket (covered with a rag so I didn't scratch it) - then just screw them in! 


With one in each corner you will need lots of washers and screws!


All finished! I think it would be cute to add leather handles or maybe a chalkboard tag to it, but for now these do the job and I'm happy with how they turned out, they're durable and so cute.


7.22.2014

One Kings Lane: Vendor Spotlight

Last post I spotlighted Joss & Main and did a mock living room design based off some of their pieces so I thought this time I would showcase some of the fun finds that One Kings Lane has to offer. They have some really neat vintage pieces and it's so fun to browse through their selection! One Kings Lane can be a bit pricier than Joss & Main, but both of these websites offer new items daily, and once it's gone - it's gone! So if you love it, get it!


I started my research looking through the "Cottage Charm" collection, where I was first drawn in (& where I found that adorable sofa!) But after finding that unique garden stool and fun, colorful rug I ended up going in a different direction than my typical neutral palette. I love the mix of vintage items and colorful accents.

Sloane Chair, $1,399.00
Samui Coffee Table, $1,949.00

5.27.2014

Neutral Inspiration

As I was perusing Joss & Main this morning I came across "The Urban Homestead" collection, which was (unfortunately) expiring today. I instantly fell in love with the light neutrals and different textures of wood, metal, suede and fabrics! I thought I would do a design board showcasing some of these beautiful pieces along with a few others from Pottery Barn and Birch Lane for a mock living room.

The Landon Upholstered Sofa in Metal Gray is from Pottery Barn, along with the Tanner Nesting Side TablesMercury Vases, and Wicker Basket for accessorizing the shelving unit. The Joss & Main collection showed mostly leather sofas, but I really like the softness of the gray fabric. The Ampersand Sculpture is from Birch Lane and the Resin Deer Head is from Bed Bath and Beyond... I love how the deer head adds a unique flair of rustic while being so modern at the same time.

All of the other items are from Joss & Main. If you haven't signed up for their daily emails, I would definitely recommend it! They have some really great pieces in all sorts of styles that are updated daily, and the prices are great, too.

Happy Shopping!

4.14.2014

Happy Easter {Decorating}!

I love spring time, it's so beautiful outside with all the flowers and trees in bloom. Easter, in particular, is a holiday that is full of happy memories for me - egg hunts, new Sunday dresses, and family dinners.

This year is the first year I actually decorated for Easter. I like to keep things simple and clean, so I only did a few accessories on my "new" piano and, of course, I will be adding beautiful blooms to our kitchen table!


I found most of the decor from Target, like these ceramic bunnies and the burlap banner below. The small nest is from World Market and the larger nest is from Michaels. The pink bunny eggs are from TJ Maxx Homegoods.


Pinterest has so many cute ideas for egg and bunny garland, but when I saw these burlap bunnies - for $6 - I had to get them!


I found this blue egg bird nest from World Market and had the perfect home for it in this bell jar.


Happy Easter!


3.26.2014

The Power of Accessorizing

I recently shopped for and installed accessories for a client who wanted their new 2 bedroom rental to feel more like a home. 
It's amazing what art, pillows and a few accessories will do for a space! Without painting or changing any furniture, and sticking to a budget under $2000, we achieved a Pottery Barn look for a fraction of the price! Here are some pictures of the finished product.

Enjoy!

Living Room


This sweet little succulent along with the porcelain vase is from Ikea and all together totaled under $5! The wood stemmed candle is from Target and the tray is from TJMaxx Homegoods.


{Before}


Dining Room


I love this mirror, especially with the combo of the sconces on each side! Mirror is from Hobby Lobby and sconces are from Kirkland's.

{Before}


Master Bedroom & Bathroom


*This print is available on my website Designs from Home.

  
{Before}


Guest Bathroom


This chrome shelving unit and glass jars are a beautiful way to display the necessities of the bathroom. 


{Before}


1.09.2014

Happy New Year!


Hoping you had a Happy Holiday & wishing you a very Happy New Year!


12.16.2013

A Christmas Bedroom - for Kids!

It's the holiday season!

I love this time of year. It's so fun to see the joy on the little ones faces when they see Christmas lights and decorate trees and, of course, get all those presents! This is the first year we got a big, real tree in our living room since we've had our sweet boy, who is now 3! So, I decided to put to use the small 12" tree that we had been using in our years in New York in E's room.


Once I set up the tree, I thought it would be cute to add a few more accents to his room from items we already had around the house, including some of his own toys - so here they are!


E's grandma got him his very favorite Angry Bird Ornaments & they were the perfect size for his very own tree!


We got this cute little train in Gettysburg and although it's not on a track circling the tree, it still adds a bit of nostalgia.


On the other nightstand I put one of E's red trucks carrying a Christmas tree along with some "reindeer." So cute, but I really can't take credit for this - I got this idea from Sixty-Fifth Avenue blog, as I did the tree with snow and animals in the glass cloche below.


Sixty Fifth Avenue blog used reindeer, but I saw these cute polar bears at Michaels and thought they'd be perfect for the winter wonderland on E's dresser.


I used extra batting I had lying around for the white snow and got the pine tree at Michaels.


Another detail for E's dresser: using blocks to create a "Christmas" tree. 
We made the reindeer feet last year from an idea I found on pinterest from Life In Motion blog.


E's sock monkey got a make-over with Santa's hat - so simple, yet E loves it!


And one last detail for the room - fresh pine tied to the foot of his bed. 
We trimmed the tree and I couldn't just throw out the branches! So here they are, looking so festive and smelling so wonderful.


Merry Christmas!